

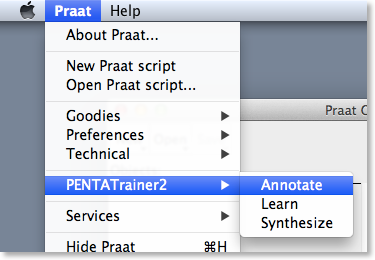
1. (Plug-in version) Open Praat and click on the menu Praat -> PENTAtrainer2 -> Annotate
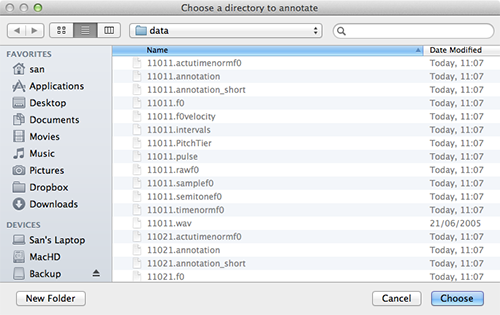
2. (Plug-in version) Choose the working folder.
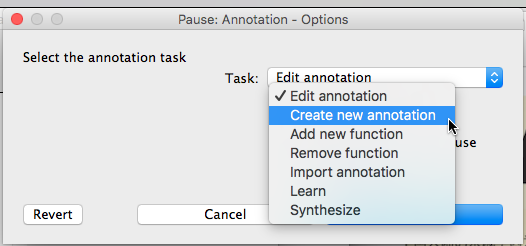
3. (Both plug-in and script versions) Now select “Create new annotation”. Click Start to continue.
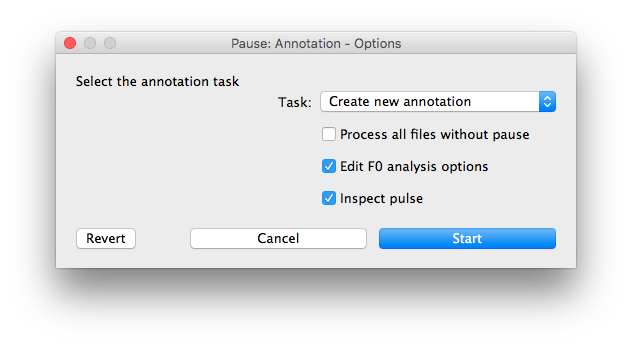
4. You can also edit the F0 analysis parameters used in the F0 extraction process by checking the “Edit F0 analysis option” box. For accurate F0 estimation, pulse marks can be manually inspected by checking the “Inspect pulse” box. The accuracy of estimated F0 depends on whether the pulses were marked correctly.
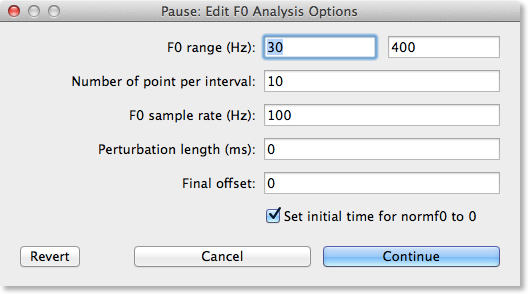
5. If the “Edit F0 analysis option” box is checked, PENTATrainer2 will show the “Pause: Edit F0 analysis option” window. In this window, you can fine-tune the F0 estimation process. F0 ranges indicate the possible minimum and maximum F0 values that will be searched. Number of point per interval specifies the resulting number of F0 points in each annotated interval in the .timenormf0 files (which is useful only for optional graphic displays and has no impact on parameter learning). F0 sample rate indicates the sampling rate of F0 estimation. “Perturbation length” & “Final offset” and the check box “Set initial time for normf0 to 0” are used only for generating F0 measurements and so do not need to be changed. Click “Finish” to continue.
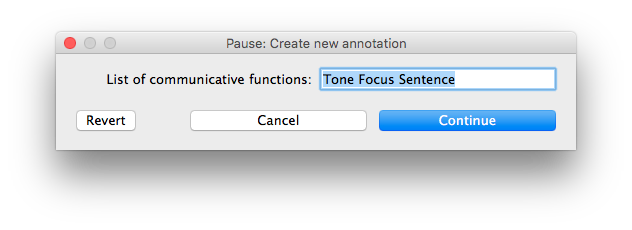
6. PENTATrainer2 will display the “Pause: Create new annotation” window. In this window, You can specify the list of information encoding layers in the “List of communicative functions” text box. The format of the text must be space-delimited. Each name in the list will be used as a name of the information layer in the annotation files.
In PENTATrainer2, the most labor intensive task in annotation is the marking of temporal boundaries of prosodic events. In case you have already marked the boundaries in Praat’s TextGrid format, they can import the existing boundary markings by filling in the filename extension of the existing marking files in “Copy boundary from” and the tier number of the boundary data. If there are no existing markings, you must ensure that the “Copy boundary from” text box is empty. Click “Finish” to continue.
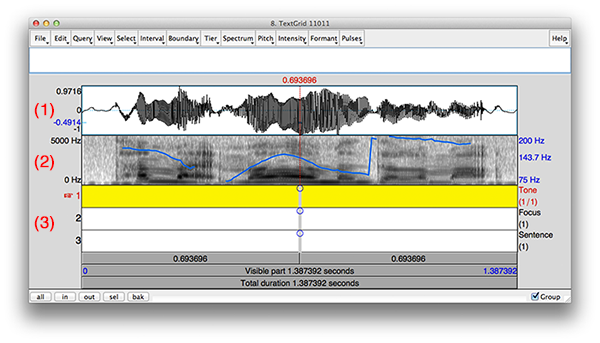
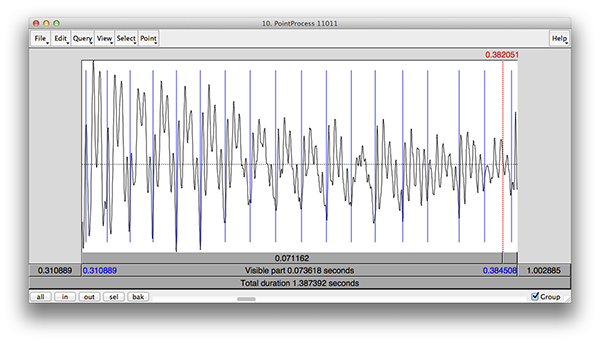
7. For each .wav file, two windows will prompt for your input. The first window (upper) shows the annotation window in which you need to put in boundaries of each prosodic event. The second window (lower) shows the pulse marking window in which you can manually inspect and change the pulse mark locations. Note that the pulse marking window will only be shown if the “Inspect pulse” box in the “Annotation – Option” is checked,
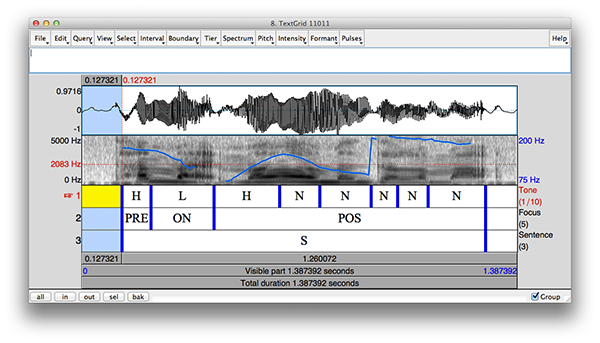
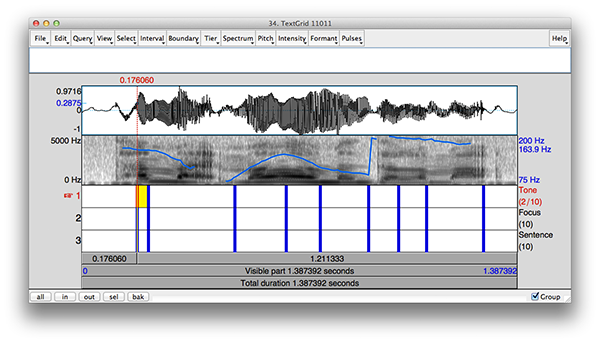
The annotation window shows three main panels: (1) speech signal (waveform), (2) spectrogram and pitch contour (estimated by Praat but not used by PENTAtrainer2), and (3) functional encoding layers. Panels (1) and (2) help you put in the boundaries of prosodic events in each layer in panel (3). You can insert boundaries by using the “Boundary” menu on the top of the window or using the shortcuts as listed below:
- Add on all tiers (Mac: ⌘F9)
- Add on selected tier (Mac: ↵)
- Add on tier number 1-8 (Mac: ⌘1-⌘8)
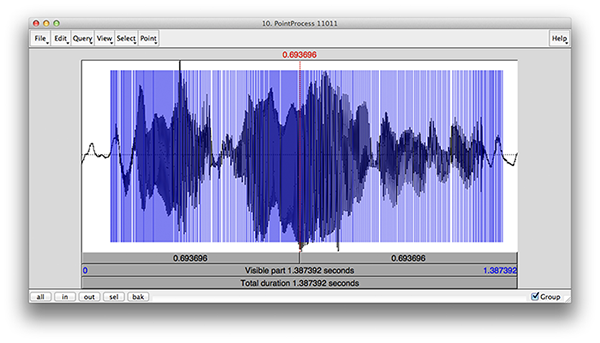
The pulse marking window contains only one panel which displays the speech signal in time domain (waveform). The vertical blue lines are pulse marks which specify the locations where the signal appears to repeat itself. The distance between each pulse mark thus indicates the pitch period which is inversely proportional to the fundamental frequency. The pitch estimation algorithm in PENTAtrainer2 uses this pulse mark information to calculate F0 rather than using Praat’s pitch tracks. The pulse marking window allows you to rectify the pulse mark in cases where the initial markings are incorrect. The pulse mark data are stored in the pulse marking files (.pulse). If you prefer to use existing pulse marking data, they need to copy the pulse marking files to the working folder before running the annotation script.
It should be noted that in this version of PENTATrainer2, boundaries in all layers must be synchronous with the boundaries in the layer with the highest number of intervals.
8. Add boundaries to each layer in the annotation window. You should add boundaries to the layer with the highest number of interval first, because boundaries in other layers must be synchronous with it.
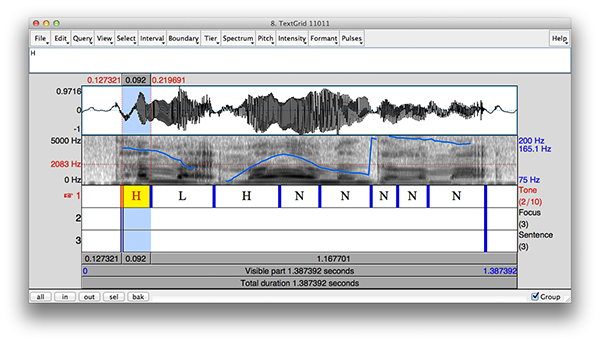
You can then used the boundaries in the marked layer as shown in the figure below as the outline to other layers.
9. (Optional) You can rectify the pulse marks in the pulse marking window using the following keyboard shortcuts:
- Add point at cursor (Mac: ⌘P)
- Remove point(s) (Mac: ⌥⌘P)
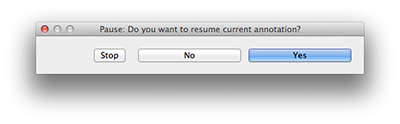
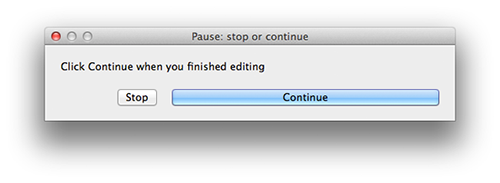
10. After finishing annotation and rectification of pulse marks, click “Continue” on the “Pause: stop or continue” control window to save data and continue to the next sound file.

11. Repeat steps 7-10 until all the sound files are annotated.
12. You can stop the annotation task at anytime by closing all windows. To resume the incomplete annotation, only steps 1-3 need to be repeated. The program will show a prompt asking whether you want to resume the current annotation. Click “Yes” to resume the incomplete annotation task or click “No” to start the annotation from the first sound file in the working folder.
13. (Optional) You can use the existing boundary marking files. For example, if the existing marking filename extension is “.target”. Copy all the “.target” files to the working folder and repeat the whole process again except filling in “.target” to the “Copy boundary from” text box in step 5. The annotation program will copy boundaries to the first layer. You can then add the boundaries so that the resulting intervals reflect the temporal span of each prosodic event.
Back to top
1. Open Praat and click on the menu Praat -> PENTAtrainer2 -> Annotate
2. Choose the working folder.
3. To edit or view existing annotation, select “Edit annotation”. Click Start to continue.

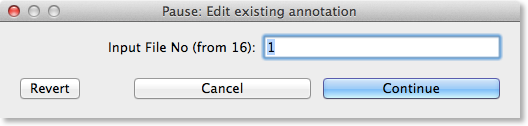
4. The program will prompt with the window “Pause: Edit existing annotation” to ask for the starting file number. You can find the number of the input file from the row number in the generated “FileList.txt” (Tip: You can use a spreadsheet program to open “FileList.txt” to find out the input file number”). Using number 1 will make the program go through every annotation files. Click Continue to continue.
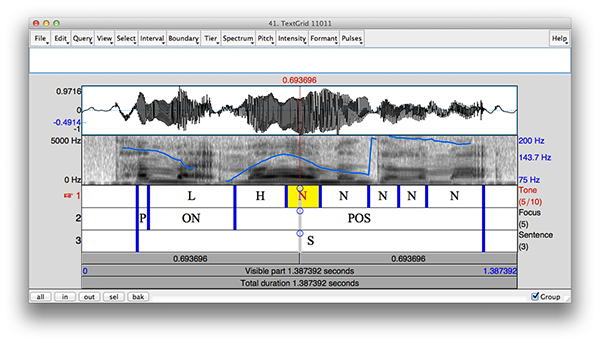
5. The program will subsequently display the annotation window that already has annotation data from the existing annotation files.
6. After finished editing/viewing, click Continue to proceed to the next file.
7. Repeat steps 5-6 until all annotation file are edited/viewed. You can quit the editing/viewing anytime by closing all PENTATrainer2 windows.
Tip: If you quit the annotation process before going through all annotation files, some of the Praat objects will not be properly removed from the “Praat Objects” window. You should make sure that these objects are removed before running other scripts to ensure the correct object reference.
Back to top
WARNING: Adding a new function must be finished in one go. Quitting during this process will result in inconsistent annotation files. Therefore, you are advised to first add a new function tier to all annotation samples first (by clicking Continue) and then edit the functional categories afterward.
1. Open Praat and click on the menu Praat -> PENTAtrainer2 -> Annotate
2. Choose the working folder.
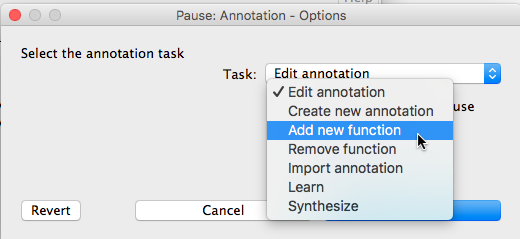
3. To add new function, select “Add new function”. Click Start to continue.
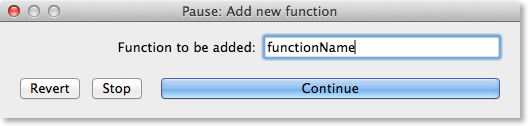
4. Type in the name of the new function to be added. Click Continue to begin the adding process.
5. The new tier will be added to below the bottom tier. The temporal boundaries were copied from the first tier (presumably having the smallest unit). You need to readjust the temporal boundaries to fit the behaviour of the input function and edit the category names.

6. After finished adjusting and editing, click Continue to proceed to the next file.
7. Repeat steps 4-5 until all annotation file are edited/viewed.
WARNING: Adding must be finished in one go. Quitting during this process will result in inconsistent annotation files. Therefore, you are advised to first add a new function tier to all annotation samples first (by clicking Continue) and then edit the functional categories afterward.
Back to top
1. Open Praat and click on the menu Praat -> PENTAtrainer2 -> Annotate
2. Choose the working folder.
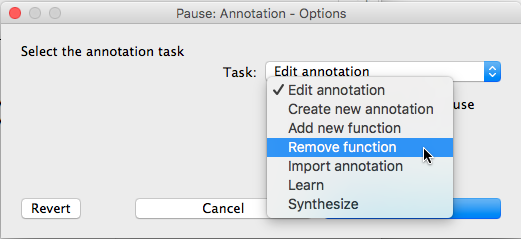
3. To remove a function, select “Remove existing function”. Click Start to continue.
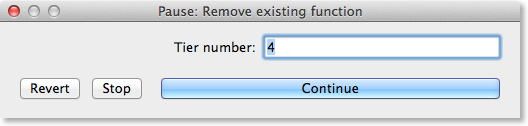
4. Type in the tier number of the function to be removed. Click Continue to begin the removing process. Caution: this process is irreversible.
Back to top
- FileList.txt contains a list of input sound files in the annotation process. It contains a one column headerless table with each row correspond to each input filename. This file is generated at the beginning of the annotation process.
- config.txt (required for parameter learning) contains a list of parameters in the annotation process that will pass along to the learning process. It contains a two-column table with header (parameter, value). Each row corresponds to a parameter to be passed. This file is generated at the end of the annotation process. You must run through the annotation process at least once to generate this file.
- function.txt (required for parameter learning) contains a list of communicative functions. It contains a one-column table with header with each row corresponding to each function. This file is generated at the end of the annotation process. You must run through the annotation process at least once to generate this file.
- [sound_file_name].annotation (required for parameter learning) contains annotation data in Praat TextGrid format. This file is a machine-friendly version derived from the “.annotation_short” file which contains a more user-friendly version. This file is regenerated in each annotation process.
- [sound_file_name].annotation_short contains a more user-friendly annotation in Praat TextGrid format. This file is regenerated in each annotation process.
- [sound_file_name].pulse contains pulse marking for F0 estimation. It is a Praat PointProcess object. This file is regenerated in each annotation process.
- [sound_file_name].rawf0 contains F0 data directly converted from their corresponding “.pulse” files. This file is regenerated in each annotation process.
- [sound_file_name].PitchTier contains trimmed F0 data in Praat PitchTier format. This file is regenerated in each annotation process.
- [sound_file_name].f0 contains trimmed F0 data directly converted from their corresponding “.PitchTier” files. This file is regenerated in each annotation process.
- [sound_file_name].samplef0 contains F0 data sampled only for non-empty intervals. This file is regenerated in each annotation process.
- [sound_file_name].f0velocity contains F0 velocity data sampled only for non-empty intervals. This file is regenerated in each annotation process.
- [sound_file_name].timenormf0 contains timeless F0 data normalized to have equal number of samples per interval. This file is regenerated in each annotation process.
- [sound_file_name].actutimenormf0 (required for parameter learning) contains F0 and actual time values. They were sampled and normalized to the specified number of samples per interval. It is a three-column table with header with each row corresponding to each F0 data point. The first column corresponds to the annotation intervals of the first layer. The second and third columns are the time and F0 data. PENTATrainer learning program uses F0 and time data in this file to learn the parameters. This file is regenerated in each annotation process.
Back to top