About FIACH
FIACH is an open source R package used for retrospective noise control in fMRI. The package is written in a mixture of R and C++. It is distributed via Comprehensive R Archive Network (CRAN). FIACH also contains functions for smoothing, visualizing, and filtering fMRI data. A Graphical User Interface (GUI) is also included. This interface is implemented using the packages tcltk and tkrplot.
Complaints
If you have any complaints or questions please contact me at fiachmri@gmail.com. Do not use my UCL email address unless you have non-FIACH related questions. While I will support the use of FIACH on any operating system I will only support installation and setup problems on Linux based systems and Windows. This is primarily due to to problems installing packages reliant on FORTRAN and tcltk on Mac systems.Warranty
Copyright (C) <2015> Tim TierneyThis program is free software; you can redistribute it and/or modify it under the terms of the GNU General Public License as published by the Free Software Foundation; either version 2 of the License, or (at your option) any later version.
This program is distributed in the hope that it will be useful, but WITHOUT ANY WARRANTY; without even the implied warranty of MERCHANTABILITY or FITNESS FOR A PARTICULAR PURPOSE. See the GNU General Public License for more details.
You should have received a copy of the GNU General Public License along with this program; if not, write to the Free Software Foundation, Inc., 51 Franklin St, Fifth Floor, Boston, MA 02110-1301 USA
Installation
If you have never used R before you may need to install a few new programs if you want to run FIACH. However, this is operating system dependent. In principle FIACH should run on most operating system but as it relies on FORTRAN and tcltk its use may be complicated on Mac systems.
Installing R on Windows
There are two things you will need to run R and FIACH on Windows based operating systems.
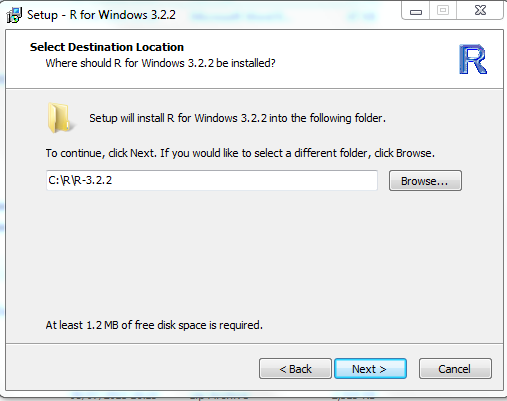
Once you have downloaded these programs you will need to install them. However the selected defaults may not be appropriate. For instance R must not be installed into the program files directory or a networked drive. You should change the location of the R folder to the path in Figure 1. The version number is allowed to be different.
I strongly recommend that you install Rstudio although FIACH does not require this software it makes working with R a lot easier. All the default settings for installing Rstudio should be fine.
Installing R on Ubuntu
If installing R on Ubuntu the process should be no different to how software is typically installed on Linux based systems. It may even come with the operating system.Installing FIACH
If you have successfully installed R on your computer installing FIACH should be relatively straightforward. If you want to install FIACH from CRAN all you have to do is copy this code into the R console in Rstudio. This is by far the easiest option.install.packages("FIACH",repos ="https://cran.r-project.org/")
Using FIACH
Having opened up RStudio the following needs to be run in the R console.library(FIACH) GUI()
Using the Viewer
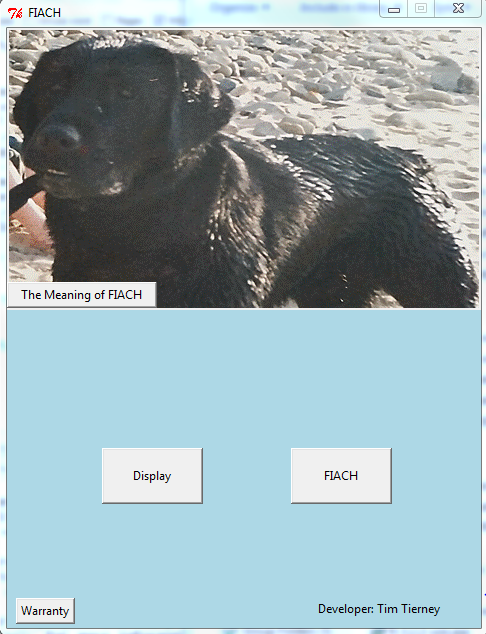
By clicking on the display button we can view images as a movie. This opens up a file selector interface that accepts regular expressions as filters.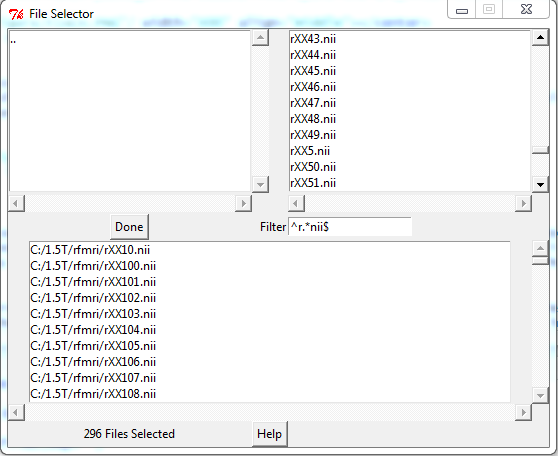
Help for using the selector can be accessed by pressing the help button. In the filter box I have asked for everything that begins with r(^r) and is followed by anything(.) any number of times(*) and ends with nii(nii$). This basic regular expression or slight deviations from it should help select the most common types of files used in fMRI.
Once you have filtered all the files you can highlight them and right click to select them. They will then be transferred into the bottom screen where the number of files you have selected will be displayed. If you have selected any files in error you can highlight them and right click to remove them. Once satisfied with the selection press the done button. This will now open a new window which will allow you to view your data. Note that if you specify a lot of files or they are particularly large files setting up the display may take a while.

By checking the movie box you should be able to spot artefacts both spatially in the images and temporally in the time-series as can be seen in Figure 4. Note that the left side of the brain may not be on the left side of the screen. This is because the primary goal of the viewer is to spot temporal artefacts. Future release will have a better orientation functionality as well as overlays.
Running FIACH
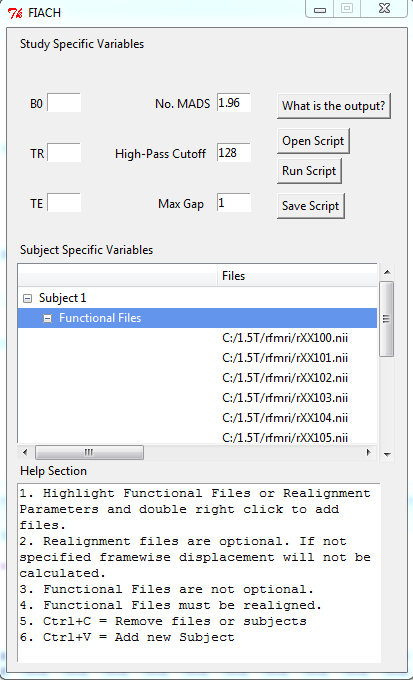
By pressing on the FIACH button in Figure 2. a new window is opened.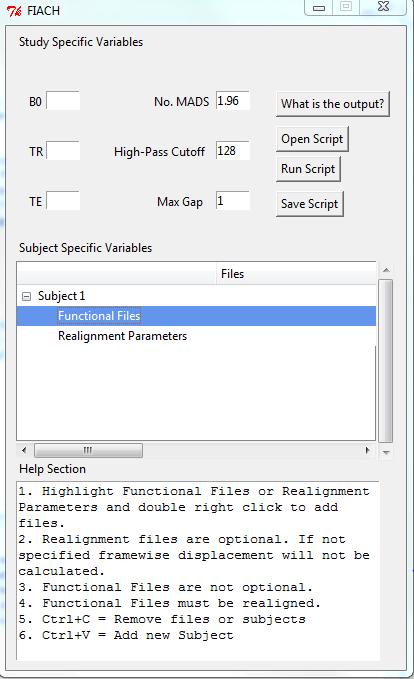
This window is divided into three sections. The first is the "Study Specific Variables" section. This section allows the user to fill in details that are common to all subjects such as the field strength, TR(volumetric sampling rate) and TE(Echo Time). All the other options in this section are defaults and are unlikely to need changing. The second window is the "Subject Specific variables" section. This is the section that allows you to specify the functional and realignment files. The last section is the "Help Section" window where help for each option in FIACH can be found. To display the help just hover the mouse over a section you don't understand. I have attempted to make this software as usable as possible but if you feel the help is inadequate please let me know.
Once you have filled out the "Study Specific Variables" section the selection of files is the same as was described in using the viewer. Simply highlight and double right-click the "Functional Files" or "Realignment Parameters" line to open the file selector. Note the Functional Files should be realigned. Also Realignment Parameters are optional but if you wish to append the FIACH regressors to them for use in further analysis you should specify them. An example of using the GUI is given below
Now that everything is set to run you can press the "Run Script" button. Optionally you can press the "Save Script" button for keeping a record of what you have done. Currently you can't save scripts to file paths with spaces in them. Once the record is saved it can be loaded into the GUI at any time by pressing the "Open Script" button (even if the script exists in a file path with a space). Details concerning the running of FIACH will be printed to the R console window. Also any errors made in GUI will be printed to the R console as well.